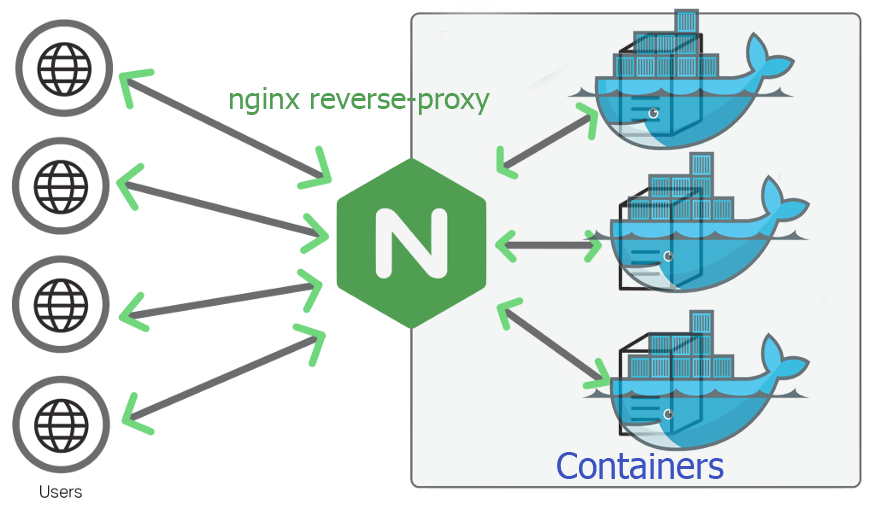
Nginx + HTTPS Setup Journey 🚀

So here’s the deal — I’ve been playing around with my Raspberry Pi 4 a lot lately. What started as a small hobby project quickly turned into a mini-server project I’m genuinely proud of. I wanted to host my own personal websites and get Home Assistant running, all behind a proper reverse proxy with HTTPS support. Sounds like a lot? It kind of is — but also, kind of awesome.
Enter: Docker + Nginx + Let’s Encrypt
To get everything flowing smoothly, I spun up a setup with nginx-proxy and letsencrypt-nginx-proxy-companion. These two images are like peanut butter and jelly for anyone trying to auto-magically generate SSL certs for their Docker containers.
Here’s what my docker-compose.yml looks like:
version: '3'

services:
  nginx-proxy:
    image: jwilder/nginx-proxy
    container_name: nginx-proxy
    restart: always
    ports:
      - "80:80"
      - "443:443"
    volumes:
      - ./certs:/etc/nginx/certs
      - ./vhost.d:/etc/nginx/vhost.d
      - ./html:/usr/share/nginx/html
      - /var/run/docker.sock:/tmp/docker.sock:ro
    labels:
      - "com.github.jrcs.letsencrypt_nginx_proxy_companion.nginx_proxy"
    networks:
      - webproxy

  letsencrypt:
    image: jrcs/letsencrypt-nginx-proxy-companion
    container_name: letsencrypt-nginx-proxy-companion
    restart: always
    volumes:
      - ./certs:/etc/nginx/certs:rw
      - /var/run/docker.sock:/var/run/docker.sock:ro
    volumes_from:
      - nginx-proxy
    depends_on:
      - nginx-proxy
    networks:
      - webproxy

networks:
  webproxy:
    external: true
Why this setup rocks 🔥
- Automatic SSL certs: Just add the right labels and environment variables to your container, and boom — you get a Let’s Encrypt certificate without lifting a finger.
- Great for hosting multiple services: I can spin up different web apps (like my own site, maybe a little blog, or Home Assistant) and let Nginx do the routing and encryption.
- Lightweight & perfect for Pi: Even on the limited resources of a Raspberry Pi 4, this setup runs smooth as butter.
Some tips from the trenches 🧠
- Make sure your network (I named mine
webproxyfor clarity) is created beforehand usingdocker network create webproxy. - Watch your file permissions, especially for the
certsfolder — Let’s Encrypt can be picky. - Monitor the logs when spinning up new containers. A simple typo in your labels or environment variables can silently break the cert creation.
Final thoughts
This setup gave me a super solid base to start building on. Running my own services on a Pi felt kind of like digital homesteading — a little out there, but incredibly rewarding.
Next stop? Maybe adding OAuth login or automating deployments. But for now, I’m just stoked that my little Raspberry Pi is pulling off HTTPS like a champ.
